Another Way
to Make Rhododendron Furniture
Making Rhododendron Furniture Making
Furnitue from Storm-downed Trees
My first nine pieces of rhododendron
furniture took a long time to make because removing the bark was
so tedious. They also need to be restained periodically. I am
leaving the bark on the next set and leaving the seats and backs
unstained. In this bench, bark is appropriate since I plan on
using a branch from a live rhododendron for one of the armrests.
Many of the steps are similar to the first method, and some of
the steps here can be used for either kind of bench.
 |
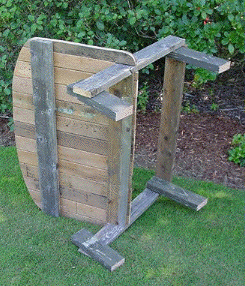
The first step
is to fabricate a rectangle of cedar (vertical in this picture)
with the two sides of the rectangle left long. They can be cut
off later. The back of the rectangle is set back from the from
the depth of the seat. I like 17 inches. (The seat back decreases
the distance by 3/4 inch, but a finish board on the front increases
it the same amount.) The finished rectangle will look like an
"A" (on its side in the picture.) The back of the triangle
should be angled for the seat back. I like 100 degrees. |
Next I attached boards for
the seat back to the angled board of the rectangle with shake
nails, and added a reinforcing board higher on the seat back.
The size and shape can vary to suit your visual ideas.
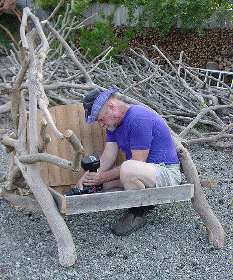
I screwed temporary legs to
the rectangle. To get the angles, I set the bench on a cement
floor and supported it with blocks so that the seat front was
15 inches off the floor and the back was 11. (The temporary front
legs could go on the front of the rectangle instead of the front
corner if you need that space open to screw the assembly into
the rhododendron legs.)

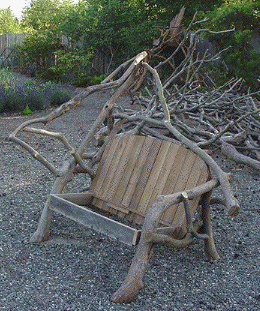
| For most of
the rhododendron benches, I make an "X" of two interlocking
branches for the front and back legs. (The left side of this
one is kept low to allow for the live armrest.) I added other
braces so that every branch is secured with deck screws in three
or more places. Check all legs and the back to make sure they
are solid, and look for triangles of strength. Braces across
the top and bottom of the bench back assure sideways rigidity. |
 |
Click here
to see the completed bench in place.


