 |
|
Bringing
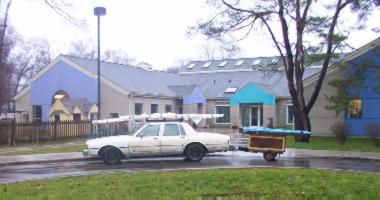
marine plywood home from the lumber store.
|
November, December 2001
I spent several weeks gathering tools, consulting knowledgeable friends, and shopping for marine plywood, clear pine and spruce, bronze fasteners, epoxy and fiberglass. Clonlara School agreed to let us use part of one large room for our building area.
December 16, 2001, Sunday
The official start of the project was a sleepover for the rest of the crew at our house on Sunday night. Apart from the normal things that 10 to 12 year old girls do at a sleepover, I had them sit down with me for a little orientation session. We covered a few things about goals and expectations, communication, cooperation, and safety.
December 17, 2001, Monday
Monday morning was dreary and wet. The girls helped me wrap up all the wood to keep it dry and load up the car and trailer. We then set out for Ann Arbor to get set up and start building. Sadly, my daughter Alegra woke up with a bad stomach-ache and had to stay home!
After arriving and setting up for the first time we tackled the first step in the instructions, which is measuring and laying out the hull sides.
All hands on deck the second day...December 18, 2001, Tuesday
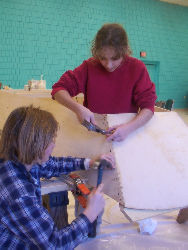
Cut out hull sides and start planing the edges fair.
December 21, 2001, Friday
Finish planing the edges and glue the butt joints between the hull side halves. Start laying out transom template.
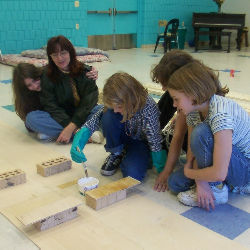
Playfulness is always close at hand!
December 27, 28, 2001, Thursday and Friday
I ripped stock for stem and frames on my table saw at home. Yes, there are some things that the girls don't get to do! Using particularly dangerous power tools is one of them.
Lay out and cut gussets and battens for frames, smooth gusset edges. Put fiberlass tape and epoxy on outside of hull side joints. Finish laying out transom top curve on template.
January 2, 3, 2002, Wednesday and Thursday
Glued up the stem assembly at home on New Year's Day.
Assemble frames, cut transom battens. Mark hull sides for location of frames, half frames. Dry fit frames and stem to sides, temporarily attach transom skin with duct tape. For the first time it truly takes on the shape of a boat!
January 7, 2002, Monday
Assemble transom, plane frame edge bevels to fit hull sides.
January 15, 2002, Tuesday
Bevel transom edges, dry fit transom. Rip chine log stock.
January 18, 2002, Friday
Notch frames for chine logs, mark ring nail pattern on bow. Adjust width of transom, re-bevel transom edges.
January 22, 2002, Tuesday
Notch frames for keelson, pre-drill stem and transom for ring nails.
January 25, 2002, Friday
Drill and countersink frame side screw holes. Drill pilot holes for transom ring nails.
Glue & nail sides to stem and transom. Glue and screw frames. SHE's a BOAT... almost!


